The Slicer [PrusaSlicer]
A 3D slicer is a crucial software tool in the 3D printing process. It serves as a bridge between the digital 3D model and the physical 3D printer. Its primary function is to convert a 3D model into a set of instructions, known as G-code, that the printer can understand and execute to create the desired object.
The 3D slicer performs several essential tasks:
-
Slicing: It divides the 3D model into thin horizontal layers, determining the precise path the printer nozzle should follow to deposit the material for each layer.
-
Infill Generation: It calculates the internal structure of the object, called infill, which determines the overall density and strength of the printed object.
-
Support Structure Generation: For objects with overhangs or complex geometries, the slicer creates temporary support structures that prevent the object from collapsing during printing.
-
Parameter Adjustment: The slicer allows users to fine-tune various printing parameters, such as layer height, temperature, speed, and cooling settings, to optimize the printing process for the desired material and object properties.
-
G-code Generation: The slicer generates the final G-code file, which contains the complete set of instructions for the printer to follow, including the precise movements of the printer nozzle, extruder temperature, and fan speed.
Setting Up PrusaSlicer
- Download the latest stable PrusaSlicer from Github
- Install the slicer.
- Open PrusaSlicer.
- If it greets you with a popup about SSL Certificates, Check
Remember my choiceand clickYes. - You will then be greeted with the
PrusaSlicer Configuration Wizard, then clickNext. - Some Prusa Printers will be checked by default, uncheck them or click
Nonein the upper right hand corner, then keep clickingNextuntil reach theOther Vendorspage. - On the
Other Vendorspage, CheckCreality, then ClickNext - Check
0.4 mm nozzleunderCreality Ender-3 V2 Neo, uncheck everything else. - Keep Clicking
Nextuntil you reach theView Modepage. - On
View Modepage, selectExpert Modeand clickFinish.
At this point the basic setup for stock Ender 3 V2 Neo is done but since we have Professional Firmware installed in our printer, we will have to make some changes (refer this for more details)
Modifications for Professional Firmware
-
Goto
Printer Settings->Custom G-code. -
Paste the following into
Start G-code; ; First layer print x min = [first_layer_print_min_0] ; First layer print y min = [first_layer_print_min_1] ; First layer print x max = [first_layer_print_max_0] ; First layer print y max = [first_layer_print_max_1] ; Total layer count = [total_layer_count] ; M201 X500.00 Y500.00 Z100.00 E5000.00 ;Setup machine max acceleration M203 X500.00 Y500.00 Z20.00 E50.00 ;Setup machine max feedrate M204 P500.00 R1000.00 T500.00 ;Setup Print/Retract/Travel acceleration M205 X8.00 Y8.00 Z0.40 E5.00 ;Setup Jerk M220 S100 ;Reset Feedrate M221 S100 ;Reset Flowrate G90 ; use absolute coordinates M83 ; extruder relative mode M104 S[first_layer_temperature] ; set extruder temp M140 S[first_layer_bed_temperature] ; set bed temp M190 S[first_layer_bed_temperature] ; wait for bed temp M109 S[first_layer_temperature] ; wait for extruder temp G29 P1 ; Home automatically and run mesh leveling on every print G29 A ; Activate UBL C108 ; Close the mesh viewer (optional) G1 Z2 F240 G1 X2 Y10 F3000 G1 Z0.28 F240 G92 E0 G1 Y190 E15 F1500 ; intro line G1 X2.3 F5000 G92 E0 G1 Y10 E15 F1200 ; intro line G92 E0 -
Paste the following into
End G-code{if max_layer_z < max_print_height}G1 Z{z_offset+min(max_layer_z+2, max_print_height)} F600{endif} ; Move print head up G1 X5 Y170 F{travel_speed*60} ; present print {if max_layer_z < max_print_height-10}G1 Z{z_offset+min(max_layer_z+70, max_print_height-10)} F600{endif} ; Move print head further up M140 S0 ; turn off heatbed M104 S0 ; turn off temperature M107 ; turn off fan M84 ; disable motors
Octoprint Setup (Optional)
You can direct start prints from PrusaSlicer if you have Octoprint and if you are connected to same same network as your printer.
- Note your printer’s IP Address.
- Open Octoprint interface in your browser.
- Goto
Settings(click the spanner icon in the top right corner). - Click
APIin the left sidebar. - Copy the
Global API Keydisplayed there. - Open PrusaSlicer.
- Goto
Printer Settingsand click on the settings icon as shown below.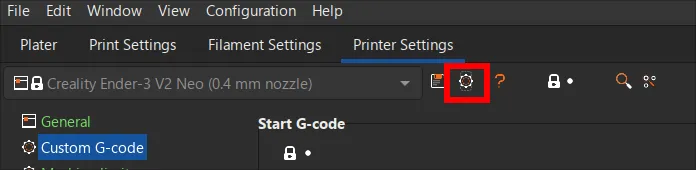
- In the popup, Write a name for the printer, such as
Ender3V2Neo - Set
Host TypetoOctoPrint - Enter the printer’s IP Address in
Hostname, IP or URL. - Paste the
API Keyyou copied in step 4 inAPI Key / Passwordfield. - Click
Testto check if the details are correct. - If it connects successfully, close the popup and click
OK
PrusaSlicer is now setup to start slicing.
Slicing models
Watch this video to understand the PrusaSlicer interface and start slicing.